Introduction
TinyUSB is an open-source cross-platform USB stack.According to their official documentation:
“TinyUSB is an open-source cross-platform USB Host/Device stack for embedded systems. It’s designed for memory safety (no dynamic allocation) and thread safety (all interrupts deferred to non-ISR task functions). The stack emphasizes portability, small footprint, and real-time performance across 50+ MCU families.”
USB theory
While USB internals are quite complex, understanding two cores components of the stack is essential: The endpoints and classes. The endpoints (EP) is the most basic addressable unit of a USB device. You can think of each endpoint as a unique communication channel , and a single USB device can host multiple endpoints to handle different types of data simultaneously. For example, you can connect your STM32 implementing a mouse endpoint, and a keyboard endpoint, and they will appear as two distinc devices in your Linux/Windows.
Every USB device needs the Endpoint 0, is the controller endpoint. It is used by the Host to fetch device information: implemented classes, sizes, timing, and so on. The rest of the enpoints are use to handle IN (Device to Host) or OUT (Host to Device) date exchange.
In order to standardize the communication, the USB defines basic functional groups called “classes”. This enable the USB Host to interact with common peripherals using a universal driver/interface. The TinyUSB simplifies this by providing ready-to-use implementation for the most popular classes:
- CDC: Communication devices (virtual serial port)
- HID: Human interface devices (keyboard, mouse, joystick, etc)
- MSC: Mass storage devices (USB stick)
- Audio: Audio device (speaker, microphone)
- MIDI: MIDI device.
- DFU: Device Firmware Update.
- Vendor: Custom vendor class.
Implementing double CDC + STM32C071 + TinyUSB Example
Recently, I have been working on integrating the tinyUSB in a STM32. For this project, I am using the NUCLEO-C071RB,
but the steps are easily adaptable to other popular families like the STM32F103 (bluepill) or STM32F411 (blackpill).
For the purpose of this example, I will focus on a double CDC implementation, which is one of the provided examples from tinyUSB.
Note
Defining the configuration for tusb may be overwhelming, so it is recommended to copy the configuration and descriptor files from the corresponding example, and then modify it to suit your need.
Configuring with CubeMX with VsCode.
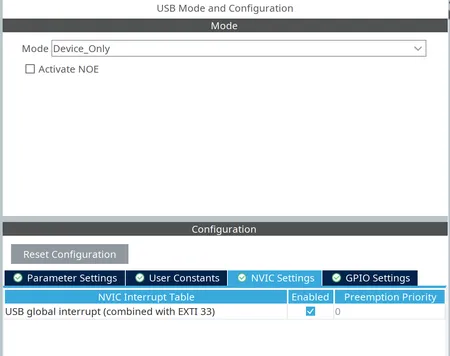
From the CubeMX we need to configure the clock for the USB, in our case 48 MHz, and enable the USB as device, with interrupt enable (see image below). You need nothing else.
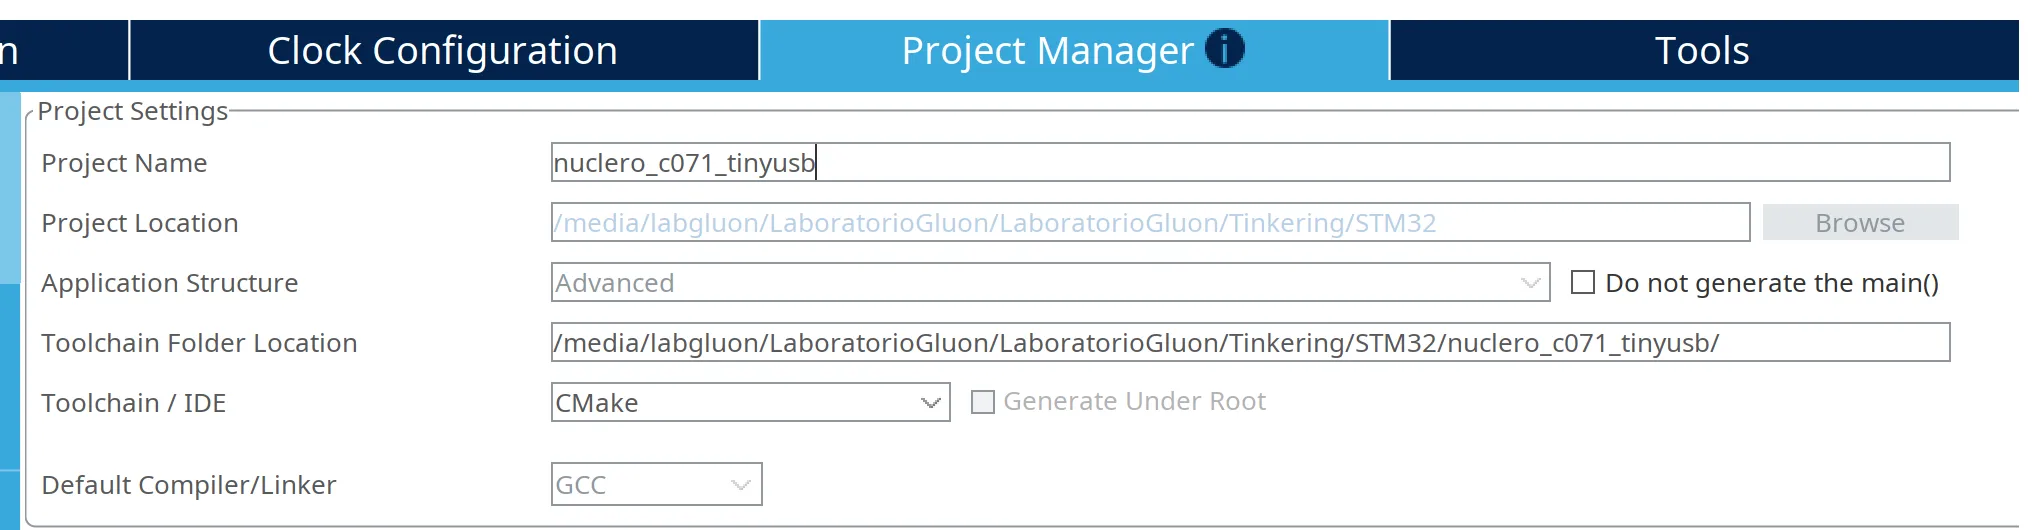
In order to use the VsCode STM32Cube extension, the project has to be configured to export as CMake project.
The CubeMX creates the basic code to start the USB as Device. However, this device, contain no funtionality and pluging in to the computer will generate nothing.
Using the TinyUSB
The easiest way to start working with tinyUSB is just cloning the last version source code in the project folder. This command download
the source code, examples and documentation of tinyUSB into the tinyusb folder.
cd <your_project_path>git clone https://github.com/hathach/tinyusb.gitThe first step is to add the sources files to our project. Since we generated the project using CMake, there is a CMakeLists.txt file in the
root folder of the generated project. TinyUSB provides CMake functions to automate this process, just include the tinyusb/src/CMakeLists.txt in our
CMakeList. The tinyusb_target_add function append the source files and include paths to our project.
# ...
# Create an executable object typeadd_executable(${CMAKE_PROJECT_NAME})
# Add source files from tinyUSB to the project.include(tinyusb/src/CMakeLists.txt)tinyusb_target_add(${CMAKE_PROJECT_NAME})# ...Getting the configuration files
The TinyUSB provides several examples on using different classes. We will base our example in the double CDC example,
located in tinyusb/examples/device/cdc_dual_ports. From this example, we have to copy the most important files:
tusb_config.h: ToCore/Inc/usb_descriptors.c: ToCore/Src/
The tusb_config.h requires the CFG_TUSB_MCU variable define, the options for this variable are located in tinyusb/src/tusb_option.h
in our case, we are using an STM32C0 so the variable shall be set to OPT_MCU_STM32C0. You can just add it to the tusb_config.h or by modifing the
CMakeLists.txt. Also, since we have added a source file to our project, the usb_descriptors.c we have to manually add it to the compilation file list.
In order to build the project, we also need the controller for the STM32 located in tinyusb/src/portable/st/stm32_fsdev/. All these changes are shown in
the code snippet below.
# ...
# Add source files from tinyUSB to the project.include(tinyusb/src/CMakeLists.txt)tinyusb_target_add(${CMAKE_PROJECT_NAME})
target_compile_definitions(${CMAKE_PROJECT_NAME} PRIVATE CFG_TUSB_MCU=OPT_MCU_STM32C0)# ...
# Add sources to executabletarget_sources(${CMAKE_PROJECT_NAME} PRIVATE # Add user sources here tinyusb/src/portable/st/stm32_fsdev/dcd_stm32_fsdev.c tinyusb/src/portable/st/stm32_fsdev/fsdev_common.c Core/Src/usb_descriptors.c)Adding TinyUSB to main.c
The source code modifications are just three simple changes: include the tusb.h header, add the tusb_init and call tusb_task()
from the while loop. Keep in mind that the tud_task() shall be run as fast as possible, precaution have to be made not to block
the main loop using HAL_Delay(...) or any other blocking calls.
//...
/* Private includes ----------------------------------------------------------*//* USER CODE BEGIN Includes */#include "tusb.h"/* USER CODE END Includes */
// ...
int main(){
// ...
/* Initialize all configured peripherals */ MX_GPIO_Init(); MX_USB_PCD_Init(); /* USER CODE BEGIN 2 */ tusb_rhport_init_t dev_init = {.role = TUSB_ROLE_DEVICE, .speed = TUSB_SPEED_AUTO}; tusb_init(BOARD_TUD_RHPORT, &dev_init);
// ...
/* Infinite loop */ /* USER CODE BEGIN WHILE */ while (1) { tud_task(); /* USER CODE END WHILE */
/* USER CODE BEGIN 3 */ } /* USER CODE END 3 */}The last change required change is to call the interrupt handler provided by TinyUSB, and avoid the default one to run.
This is done in the Core/Src/stm32c0xx_it.c, in the USB_DRD_FS_IRQHandler, if you dont have this function, you should enable the
USB NVIC interrupt in CubeMX and regenerate the code.
/** * @brief This function handles USB global interrupt (combined with EXTI 33). */void USB_DRD_FS_IRQHandler(void){ /* USER CODE BEGIN USB_DRD_FS_IRQn 0 */ tud_int_handler(BOARD_TUD_RHPORT); return; /* USER CODE END USB_DRD_FS_IRQn 0 */ HAL_PCD_IRQHandler(&hpcd_USB_DRD_FS); /* USER CODE BEGIN USB_DRD_FS_IRQn 1 */
/* USER CODE END USB_DRD_FS_IRQn 1 */}Teting it works
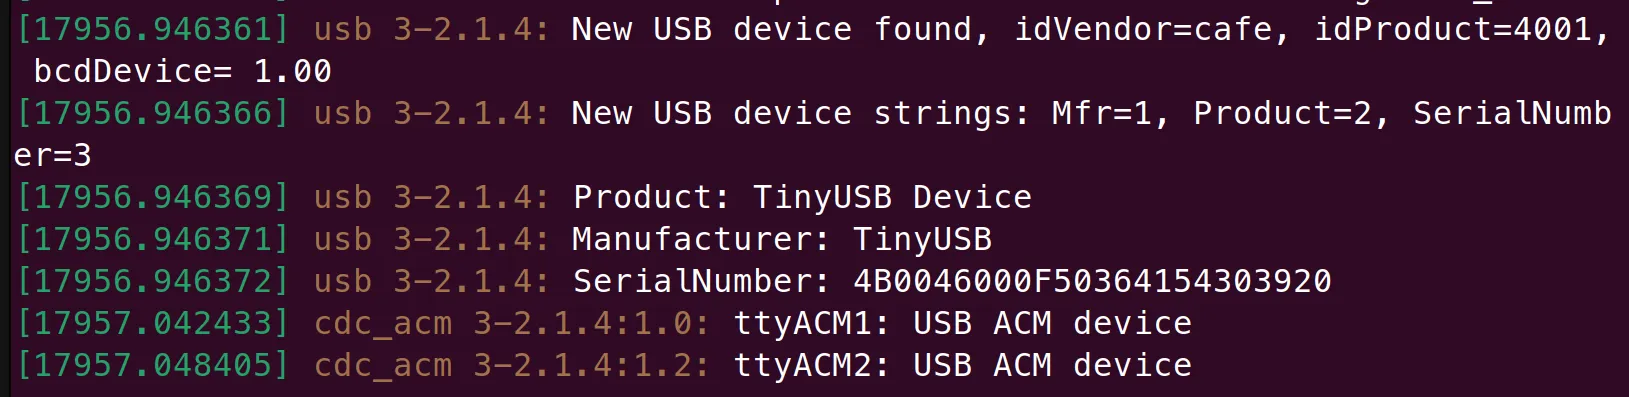
With all the changes from the previous sections, we can build and upload the code to the NUCLEO-C071RB, and check the output from sudo dmesg, or listing
, in linux, the /dev/tty* devices. You should see that two new serial port devices have been added, usually /dev/ttyACMx.
”Hello World” from CDC
Now, with the device working, we can try to send some data to each endpoint, and test that we are receiving the data in the corresponding ACMx.
To do this, we can use the tud_cdc_n_write_str(itf, str). We dont want to fill the buffer, so we just do it once every second.
/* Infinite loop */ /* USER CODE BEGIN WHILE */ uint32_t start = HAL_GetTick(); while (1) { tud_task();
if (HAL_GetTick() - start >= 1000) { tud_cdc_n_write_str(0, "Hello world from CDC 1\r\n"); tud_cdc_n_write_str(1, "Hello world from CDC 2\r\n");
// Avoid buffering tud_cdc_n_write_flush(0); tud_cdc_n_write_flush(1); start = HAL_GetTick(); } /* USER CODE END WHILE */
/* USER CODE BEGIN 3 */ }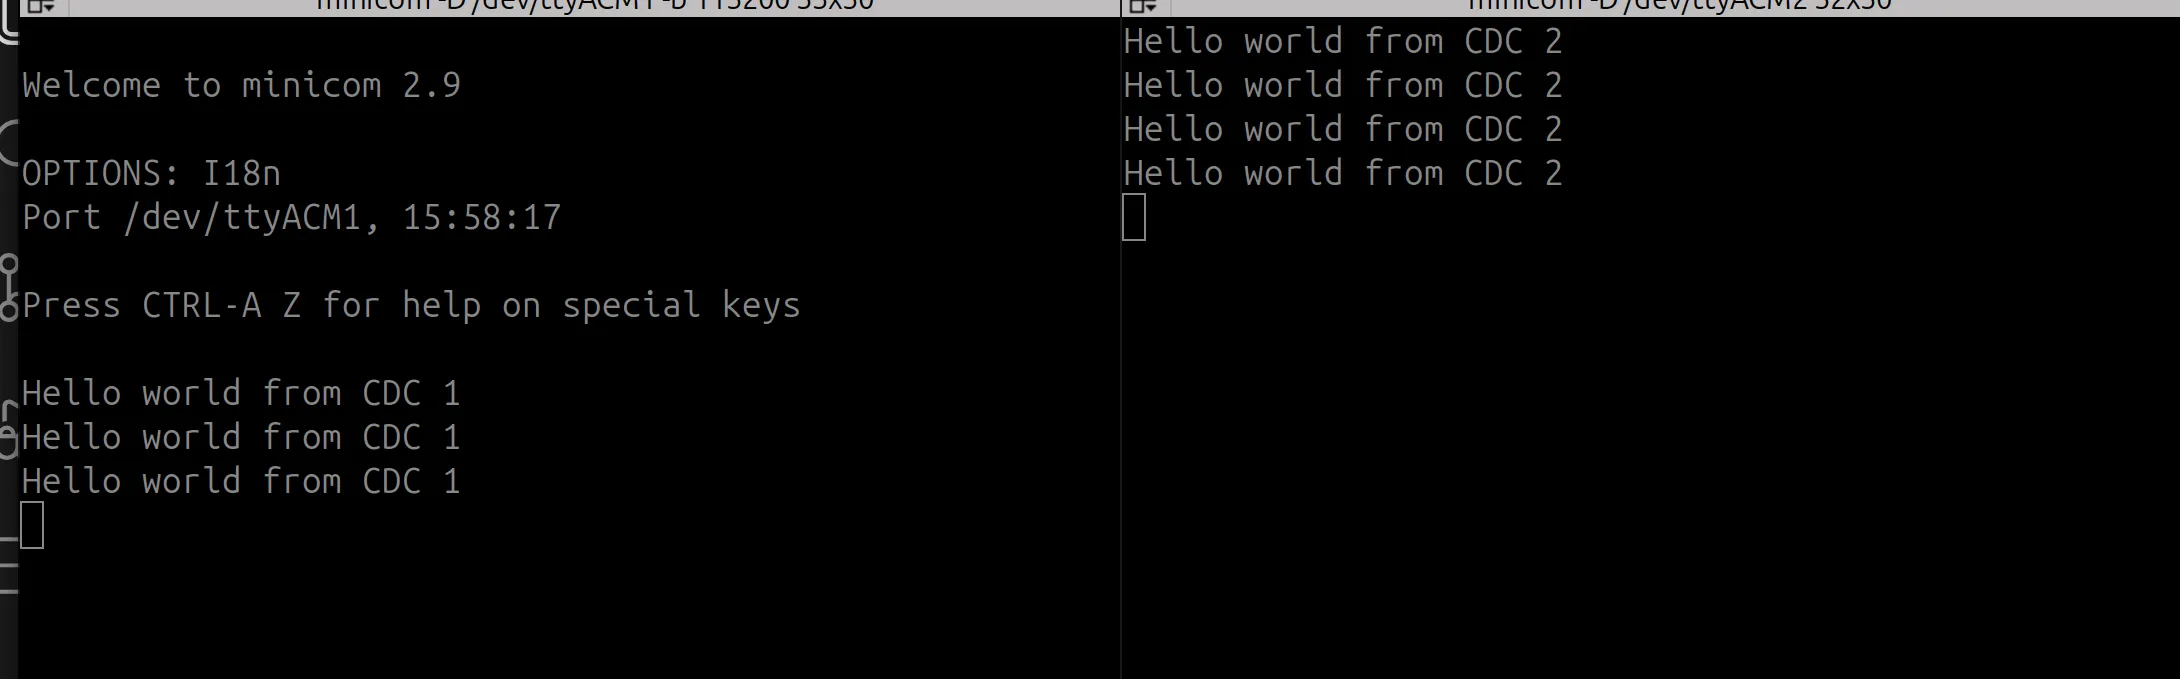
I hope you find this article useful, if you want more content dont hesitate in commenting and sharing this!