The problem
While working on my latest project, I struggled to get the nRF24L01 working with the Raspberry Pi 3. My goal was to enable communication between the RPi3 and an Arduino using these modules to exchange data. Specifically, for this project, I only needed one-way communication, with the RPi3 acting as the receiver.
I discovered that while several libraries exist for this, many are either obsolete or simply don’t support the latest version of Raspberry Pi OS. To save you the headache, I’m going to show you exactly how I got it up and running.
Required components:
- Raspberry Pi 3
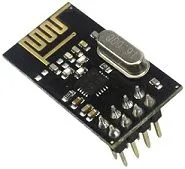
- nRF24l01 module
- Arduino Nano
- Dupont cables.
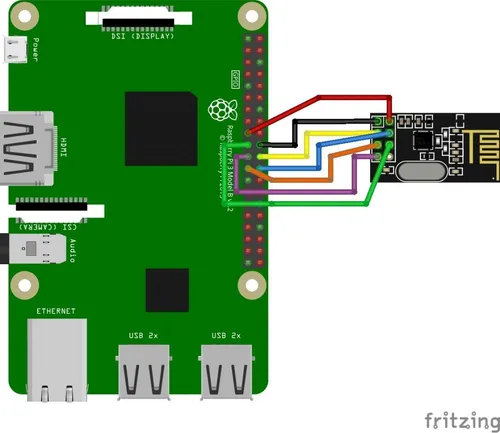
Raspberry Pi 3 to nRF24l01 connection
Setting up the physical connection between the RPi3 and the nRF24L01 can be a bit chaotic and error-prone, so take your time. You can find the wiring diagram below to guide you. I strongly recommend connecting everything while the RPi3 is powered off. Before booting it back up, double-check your power supply lines—mixing up 3.3V and 5V could be a costly mistake!
Tip
Although the standard wiring should be enough, the nRF24L01 is prone to power consumption spikes. These can cause stability issues, so I recommend adding a 0.1µF to 10µF capacitor between the VCC and GND pins of the module. This helps smooth out the voltage and ensures a much more reliable signal.
Trust me, skipping this tiny capacitor is the number one reason why these modules ‘randomly’ fail. Save yourself the troubleshooting time!
Installing the software
Enabling SPI in raspi-config
The first thing to keep in mind is that the nRF24L01 communicates via the SPI protocol, which is disabled by default on Raspberry Pi OS.
To enable it, you’ll need to use the raspi-config tool. Once the interface opens, navigate through:
'Interfacing Options' -> 'SPI' -> 'Yes' -> 'Finish' After selecting ‘Ok’ to confirm, the SPI interface will be active and ready to go.
You might need to reboot for the changes to take full effect, so keep that in mind!
Tip
Pro tip: If you prefer the command line, you can also do this by running
sudo raspi-config nonint do_spi 0Compiling the nRF24l01 library
The next step is installing and configuring the nRF24l01 library but beforehand we need to configure the Python3
# Install required Python3 librariessudo apt-get install python3-dev libboost-python-dev python3-setuptools python3-rpi.gpio
# Clone the source code repositorygit clone https://github.com/nRF24/RF24 nrf24
# Configure and compile the source codecd nrf24./configure --driver=SPIDEVmakesudo make install
# Install the library.cd pyRF24/python3 setup.py buildsudo python setup.py install
Using the installed driver.
import RF24import timeimport struct
pipes = [ 0x52, 0x78, 0x41, 0x41, 0x41 ]pipesbytes = bytearray(pipes)radio = RF24.RF24()radio.begin(25, 0) #Set CE and IRQ pinsradio.setPALevel(RF24.RF24_PA_MAX)radio.setDataRate(RF24.RF24_250KBPS)radio.setChannel(0x4c)radio.openReadingPipe(1, pipesbytes)radio.startListening()radio.printDetails()#radio.powerUp()
cont=0while True: pipe = [1] while not radio.available(): time.sleep(0.250)
recv_buffer = bytearray([]) recv_buffer = radio.read(32) print(recv_buffer)Sending data
import RF24import time
pipes = [ 0x52, 0x78, 0x41, 0x41, 0x41 ]
pipesbytes = bytearray(pipes)
radio = RF24.RF24()radio.begin(25, 0) #Set CE and IRQ pinsradio.setDataRate(RF24.RF24_250KBPS)radio.setRetries(3,5)
radio.setPALevel(RF24.RF24_PA_MAX)radio.openWritingPipe(pipesbytes)radio.powerUp()radio.printDetails()
while True: print(radio.write(b"Hola")) time.sleep(1)